SAP123
Starting with LSMW (Legacy System Migration Workbench)
Willem Hoek on Jan 11, 2013
INTRODUCTION
Legacy System Migration Workbench or LSMW is SAP standard program that can be used to easily load / change master data or transactions in SAP without any programming at all. It can be used to upload data at cutover, such as: open orders, contracts, materials, vendors, stock on hand, ……. It can also be used in a production system to make changes to existing data. Very limited authorization checks are available on the transaction, so the use of it must be very well controlled.
The functionality is very well documented in the SAP help files. Below is a simple example where vendor masters are loaded using recording in LSMW.
(For an example on how to load materials using Direct Input method in LSMW, see this post
In our example, we will follow these steps.
- Start program and create a project
- Record the transaction to be used in the load
- Define the fields to be loaded
- Define conversion rules to take place
- Define the file name
- Upload the file from PC to SAP
- Convert to correct format
- Create and run batch input session
—————- DETAIL —————–
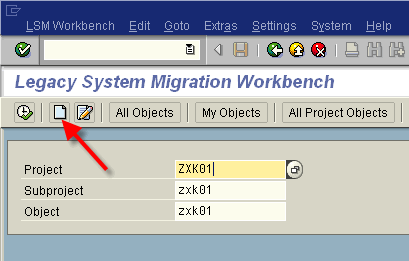
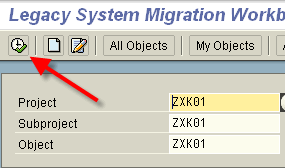
Start it all by executing transaction LSWM (program /SAPDMC/SAPMLSMW ). Define Project / subproject / Object. It is also possible to export the project to a text file, to be imported into another system.
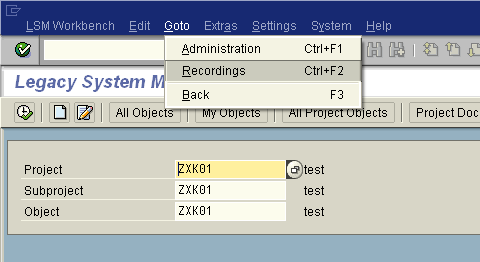
Various methods can be used to load the file, examples: BAPI, ALE, recording. We will be using a recorded transaction. To record the transaction, we give the recording a name and type in the transaction code that will be used.

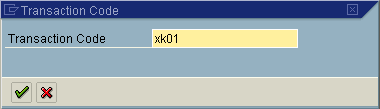
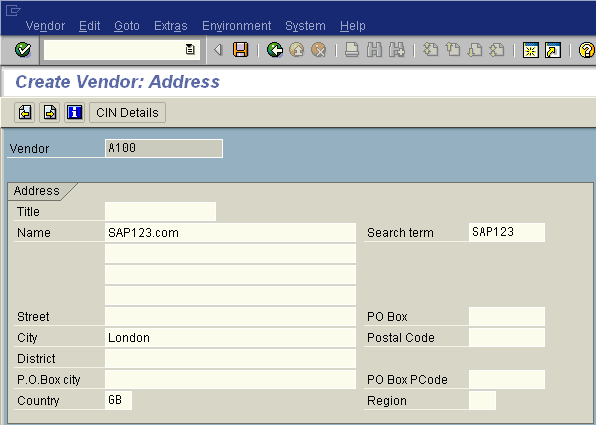
Step through the screens as you would have done it manually.

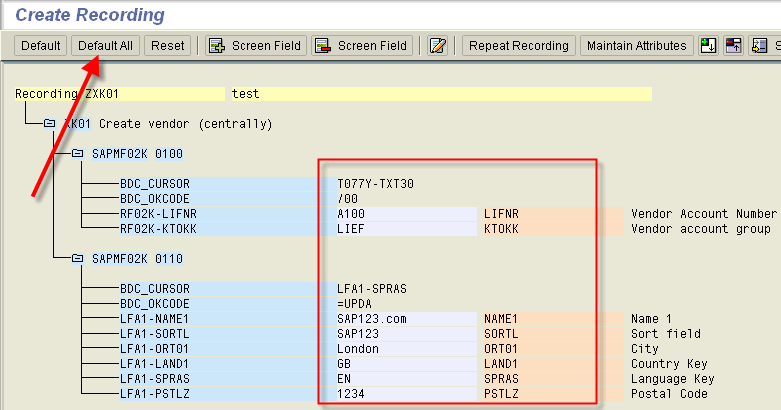
A screen will be shown with all the fields that was recorded. Every field needs a name. To keep it simple, allocate the default SAP name to the fields. Make sure all the fields you want to load/change are in the list. If not, re-record the transaction and ensure you do a dropdown or type in values in the correct field.
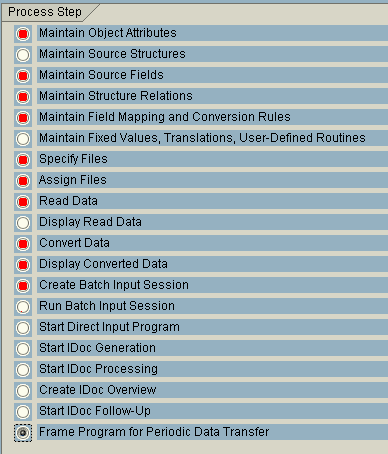
Here is a list of all the process steps that available. In our example, not all will be used. Those to be used in example are mark with a red dot. So, we will be using Process Step 1, 3, 4, 5, 7, 8, 9, 11, 12, 13.
The next screens are the process steps as in screen above.
NB: Every time you select a process step, you will be in display mode – first thing to do for every step is to switch to change mode by clicking the “Display<->Change” button.
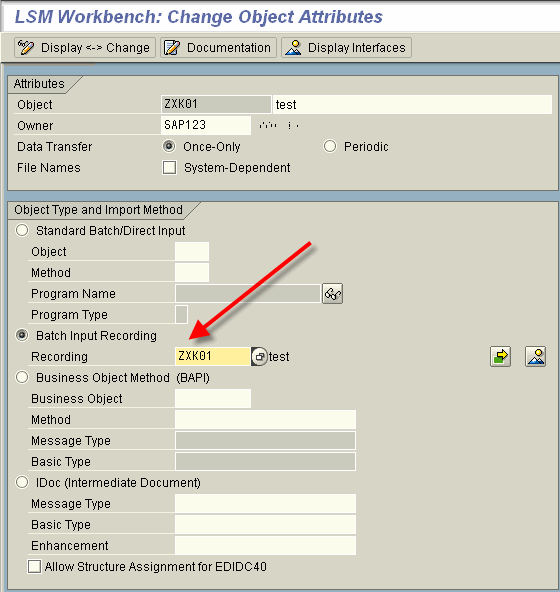
Process Step 1 - Maintain Object Attributes
Here the method to be used to load the information is defined. We will be using a BDC sesssion / recorded transaction. This method is quick to do but not the fastest. For example, if you want to load a huge amount of materials, ather use direct input method.
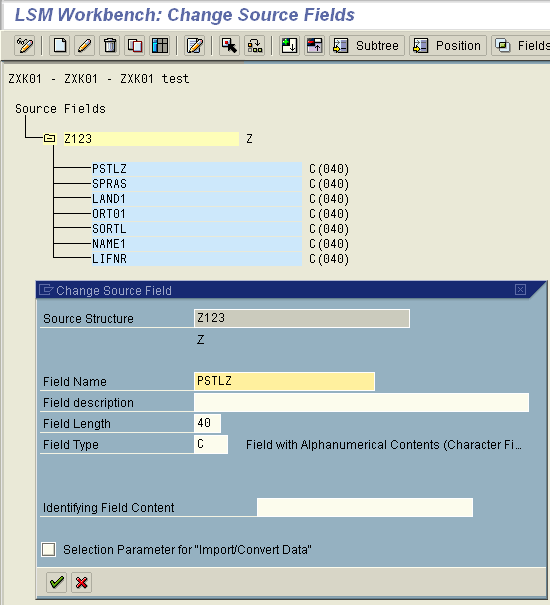
Process Step 3 - Maintain Source Fields
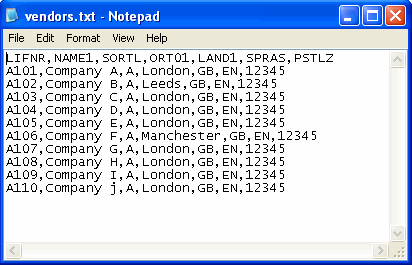
The next step is to ensure your input file is created. The input file (to be loaded in SAP) is a text file. The text file can easily be created from Excel or other data tool. Again to keep it simple, use same field names as in recording. A setting in Process Step XX will ensure that order of columns is not important.

As can be seen - in our case we used comma delimited text. It is generally better to use tab delimited format to avoid errors (example where text fields may contain commas). If you will be using LSMW quite a lot, it is better to get a better text editor and not used Notepad (as shown in screen below).
Back in LSMW, the fields in external file is defined, so make them the same as in txt file.
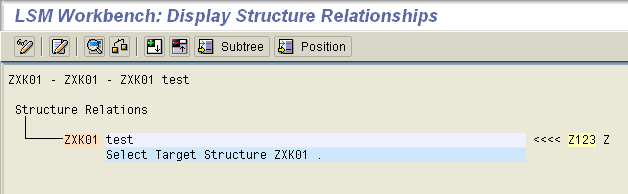
Process Step 4 - Maintain Structure Relationship
Link between recorded fields and external fields.
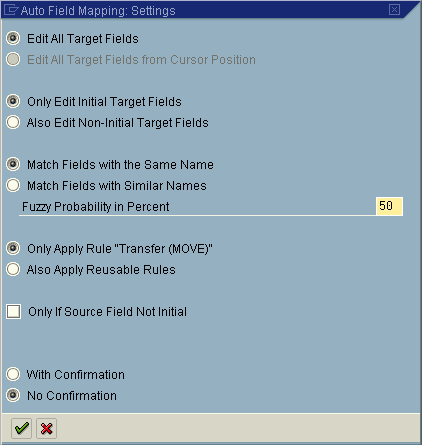
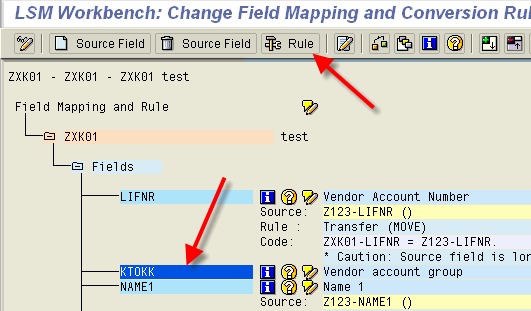
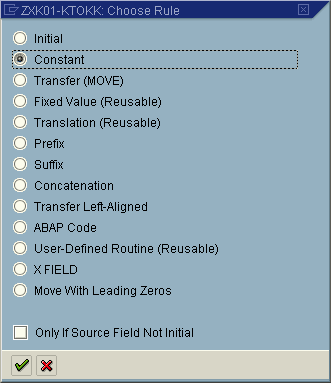
Process Step 5 - Maintain Field Mapping and Conversion Rules
In this step the rule on where the value of the recorded fields will come from is spesified. Example: values can come from an external file or a constant can be defined (for fields that will not change).
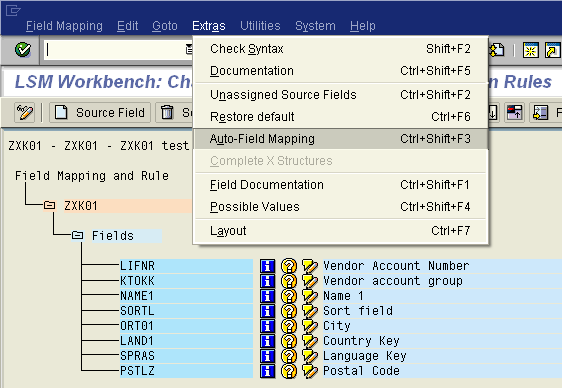
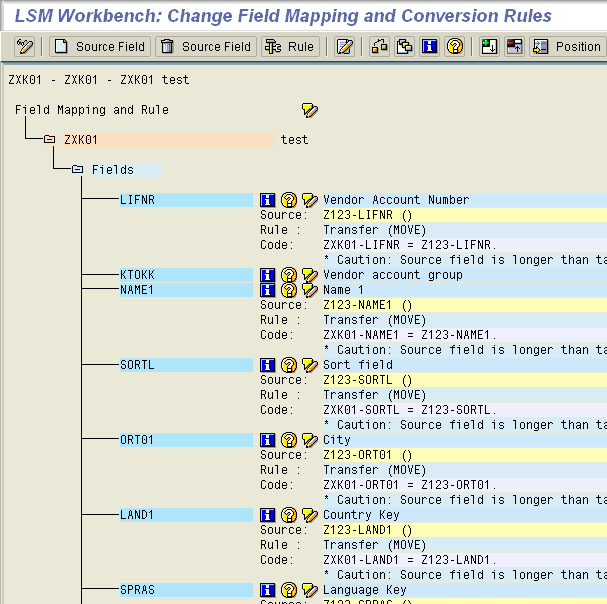
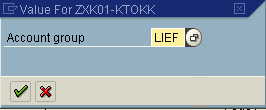
Vendor account group will not be read from external file. Lets make the field a constant value of LIEF.
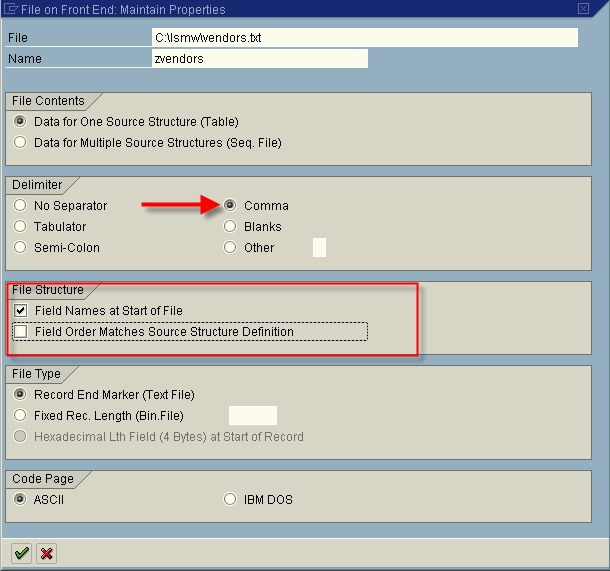
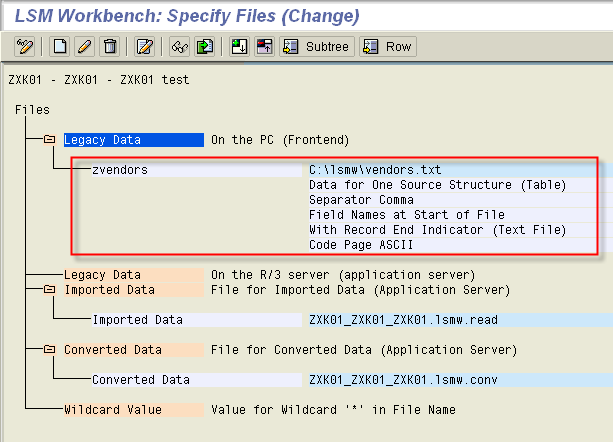
Process Step 7 - Specify Files
Before loading the file from PC, one specifies the structure. In this case comma delimited were used (although, tab delimited are more common). Also that the first row contains the header.
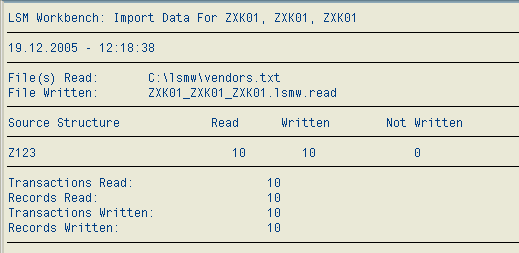
Process Step 9 - Read Data
Load the file into SAP from your PC.
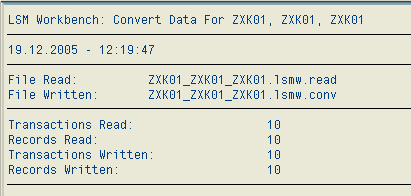
Process Step 11 - Convert Data
This applies the conversion rules that was set up in Process Step 5. So after this, all the fields to be loaded must be present and all rules applied.
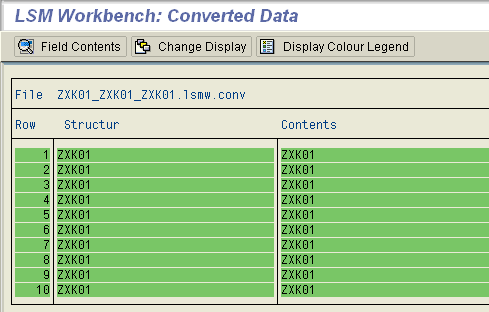
Process Step 12 - Display Converted Data
It is a good idea at this stage to view a sample set of the data to ensure that everything is ok.

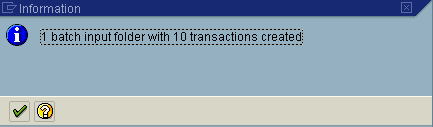
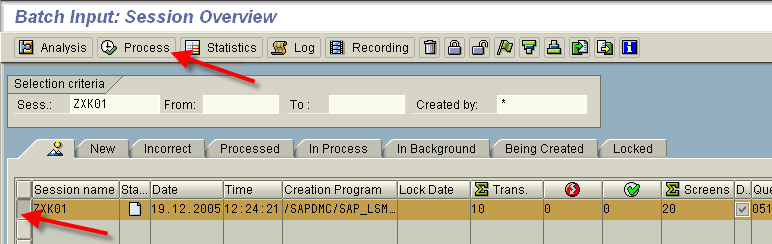
Process Step 13 - Create Batch Input Session
Generate a batch input session

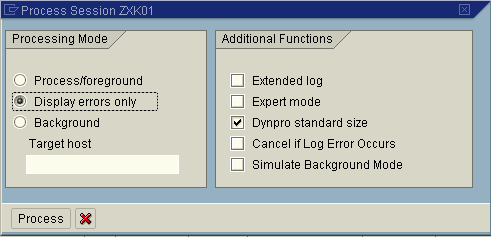
And process the batch input session.
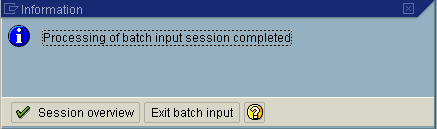
Thats it, the data should be in SAP!
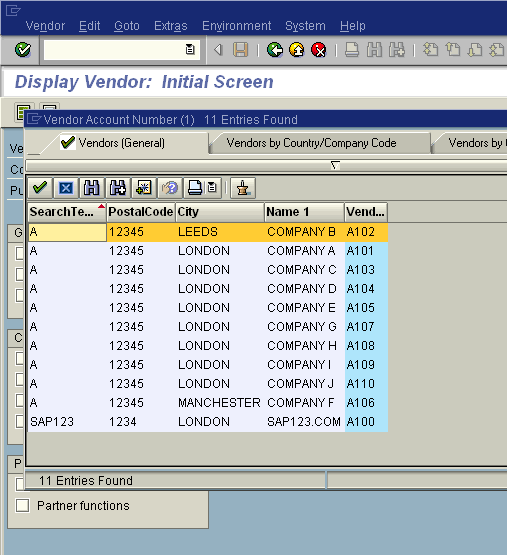
To confirm that the data was loaded correctly, verify that vendors were loaded correctly.
SAP version used for this post: SAP ECC (ERP Central Component) 5.0
LSMW version used: version 4.0.0 of the LSM Workbench from 31.08.2004 (Menu: Extras > Display Display version)