SAP123
Setting up simple Release Procedure for Purchase Requisitions
Willem Hoek on Feb 11, 2006
Release Procedures (approval) can be used for Purchase Requisitions (PR), Purchase Orders (PO), RFQ’s, Outline Agreements and Service Entry Sheets. The principle is exactly the same for all. If you can master one, you will know them all.
Lets set up release procedures for PR for the following example:
Our company have got 2 plants: Plant 3100 (London) and plant 3600 (New York).
- For New York (plant 3100), if PR item value is between 0 - 1000 USD, then PR needs to be released by one person (person B)
- For New York (plant 3100), if PR item value is bigger than 1000 USD, then PR needs to be released by two people (first by person B, then person C)
- For London (plant 3600), All PRs (therefore amount >= 0 USD) need to be released by two people. First by person A, then person C.
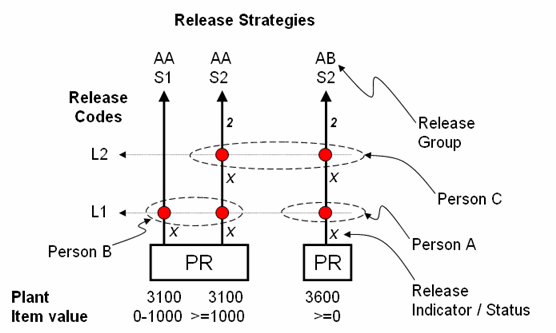
Key terminology:
- Release Codes - The different levels that the approval will go through.
- Release Groups - Grouping of strategies.
- Release Strategy - Unique, set of condition, sequence and levels of releases. Every line in diagram is a Strategy (so we have 3).
- Release Indicator / Status - The status of PR as it moves through the strategy. Example ‘Block’ (can’t create PO yet) or ‘Final Release’ (can create PO from PR)
Here is a summary of the steps to follow to set up our example:
- Create Characteristics & link to comm. structre (CEBAN for PR)
- Create Class & link to characteristic
- Create Release Groups & link to class
- Create Release Codes
- Release Indicator
- Set up strategies
- Strategies & Codes
- Prerequeirements
- Status
- Assign values for strategies
- Set overall / item for doc type (PR only)
- Create and allocate autorisation profiles
Detail steps of setting it up
Create Characteristics & link to communication structure (CEBAN for PR)
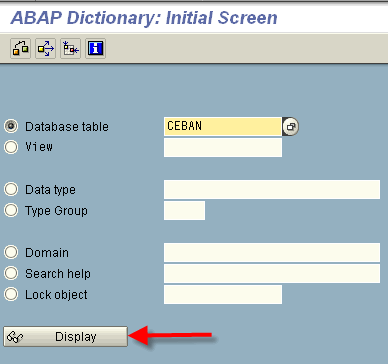
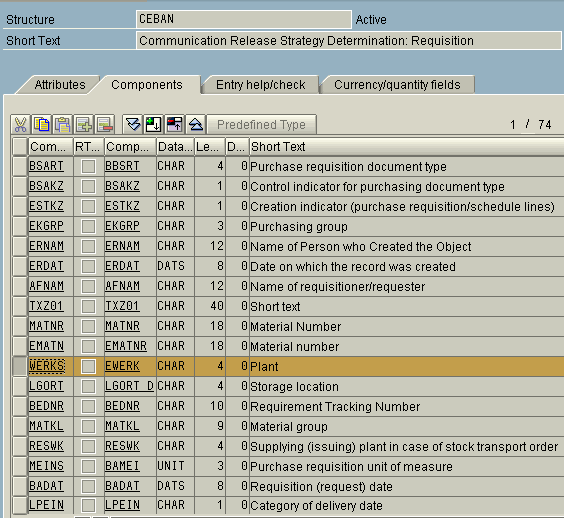
Here we define which fields are used to determine the strategy that will kick in. In our case we used ‘Plant’ and ‘Item value’. Not all fields in the PR can be used. For a full list of fields that can be used to determine the release startegy, see tcode se12 table CEBAN.
So the two fields that will be used is:
Field CEBAN-WERKS for Plant
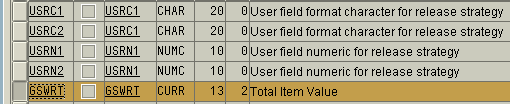
Field CEBAN-GSWRT for Item Value
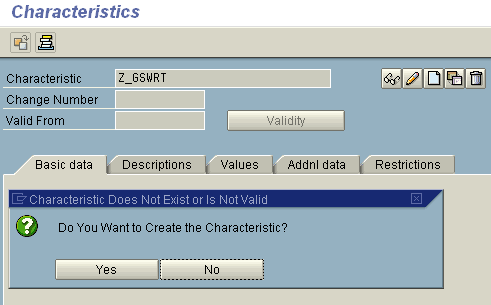
We need to create a characteristic for every field. Use transaction ct04
Any characteristic name can be used. Keep something descriptive to avoid confusion.
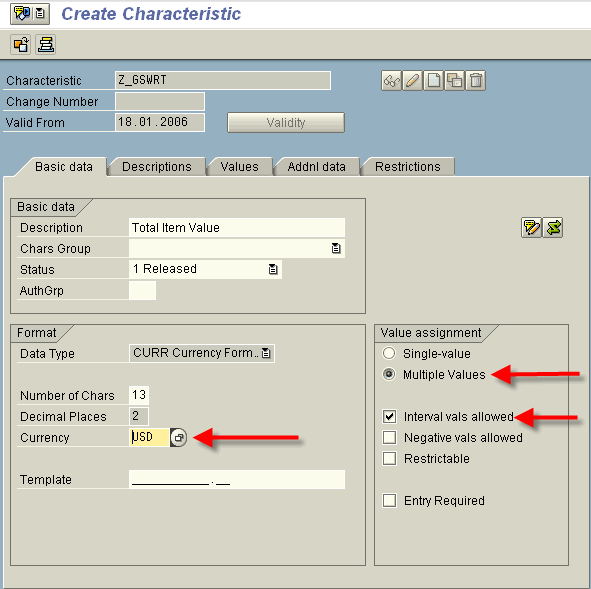
For Item Value – lets create characteristic Z_GSWRT
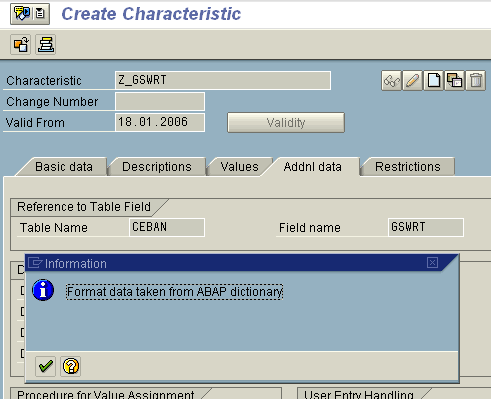
First go to Additional Data tab and enter the table/field (and Enter)
Enter currency to be used in the Basic data tab. Also select multiple values _and _Intervals allowed
The Intervals allowed will allow us to assign a range of values, example: If PR value is 0 - 1000 USD …..
Save the characteristic
For Plant – characteristic Z_WERKS
Again, the table/field name in Additional Data to enter table/field
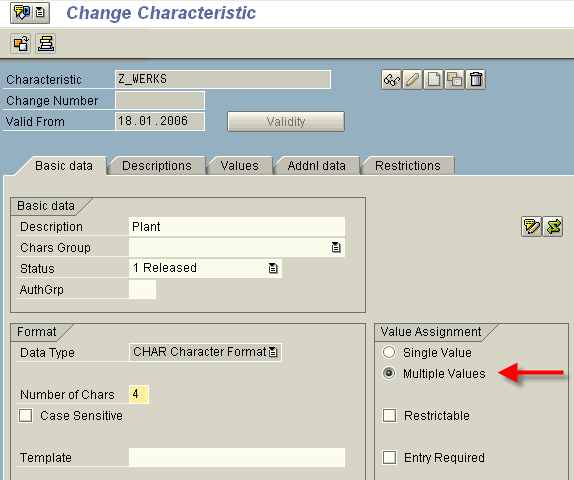
Again set multiple values and save the characteristic
The multiple values is to assign more than one plant to strategy, example: If PR for plant 3100 and plant 3600 is …
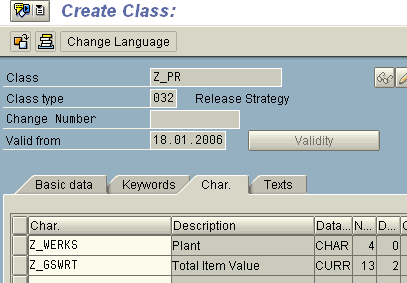
Create Class & link to characteristic
Create a class (simply to group the characteristics). Again any name can be used. Tcode CL01 – Create Class. The Class Type must be 032.
Configure Release Procedures
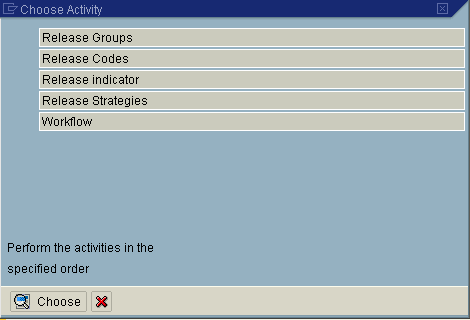
Above actions was all master data. We now need to do some configuration. Menu: IMG > Materials Management > Purchasing > Purchase Requisition > Release Procedure > Procedure with classification > Set up procedure – (tcode OMGQ in older SAP versions)
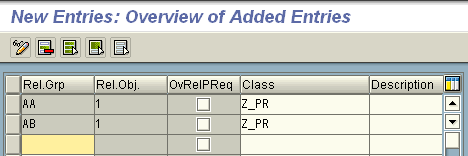
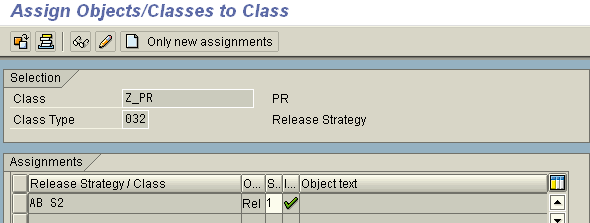
Create Release Groups & link to class
We have two groups to create AA and AB. We need to indicate the class we are working with, in out case Z_PR.
Create Release Codes
Create all the release code / group combinations. This is all the dots in diagram above. So we have 4.
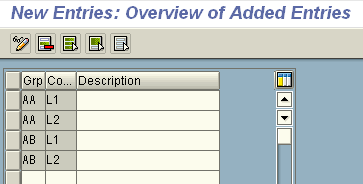
Later on, authorisation profiles will be linked to these code / group combinations.
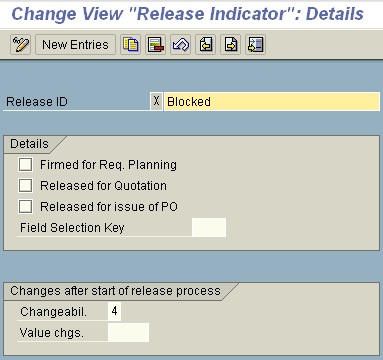
Release Indicator
First we create the different statusses that the PR can be in throughout it lifecycle. Later on (below), we will be linking using these statusses. Here is the standard SAP indicators, wou probably wouldn’t need to add any.
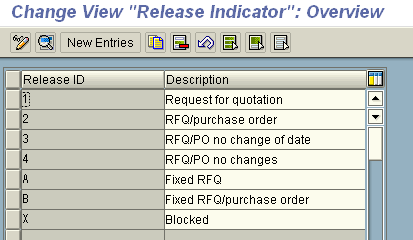
We will be using two of these – X (Block) and 2 (Released)
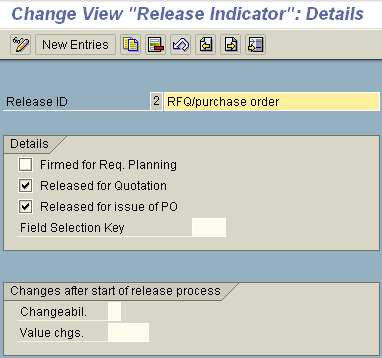
Under the Details section, you can indicate which documents can be created from this PR. For Indicator 2, one can create PO’s and RFQ’s.
With _Field Selection _you can define which fields can be changed. This is the same indicator that gets used with document type configuration to make some fields read only, mandatory, hidden.
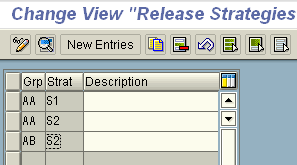
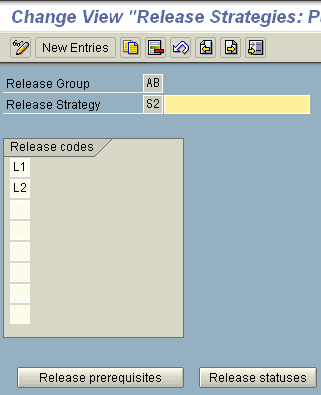
Set up strategies - Strategy & Codes
Every line in our diagram above is a strategy. So We have three
Lets call them:
Group AA / Startegy S1 – Code L1 (for plant 0001)
Group AA / Startegy S2 – Code L1 & L2 (for plant 0001)
Group AA / Startegy S2 – Code L1 & L2 (for plant 0002)
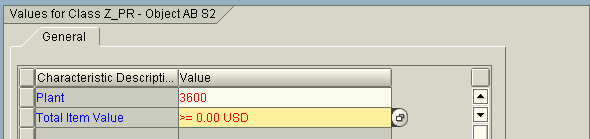
Here are the settings for AA / S2
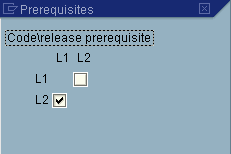
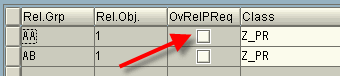
Set up strategies - Prerequisites
For every strategy, we need to define a release prerequisites. This indicate if one code need to take place before the other. In this case, level 2 (L2) can only take place if level 1 (L1) has been released.
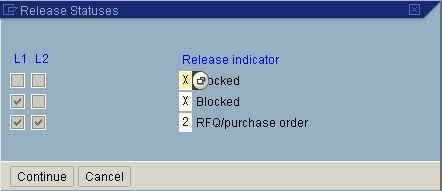
Set up strategies - Status
This is also done for every strategy. The screen is dependant on what groups were linked to the strategy as well as prerequisites that was set up. In this example:
- if nobody release it then PR is block.
- if L1 release the PR, the PR is still blocked
- if L1 and L2 release the PR, the PR can be converted to RFQ/PO
Out of interest, the reason why there is not a L2 only option is because of the setting in the prerequisites.
Set up strategies - Values for strategies
The values linked to strategies are master data (not configuration) and can be set in two places. Either within the configuration itself – selecting the classification button

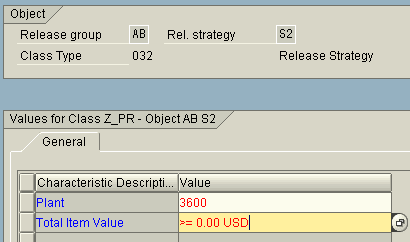
Or, in classification, example CL24N
Both methods work, the advantage of CL24N is that all the strategies can be viewed easier.
Set overall / item for doc type (PR only)
For Puchase Requisitions, there is an option to release either on item level or on document level. For PO / RFQ / Contracts, one can only release on header level. Back to the PR, it is highly recommended to use item release. This can be done in two places.
Firstly where the groups were created
On the document type configuration for PR
Config menu: Materials Management > Purchasing > PR > Define document types

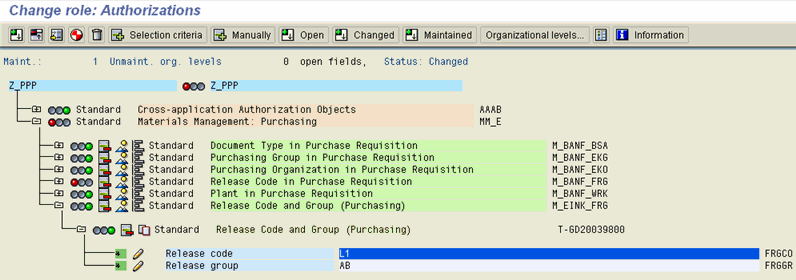
Create and allocate authorisation profiles
In our example we will have three people releasing, so three profiles will need to be created. Authorisation profiles can be created using tcode PFCG.
Usage of PFCG are not being discussed here, but see below for relevant screen where the profile was created.
————— USING RELEASE PROCEDURES —————
Create a Purchase Requisition
Lets create a PR, and see if the release procedure kicks in. In our case we will create it for plant 3600 and any value. So we will expect Strategy AB / S2 to kick in.
Create PR – me51n
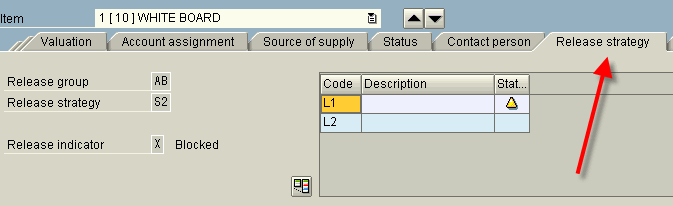
If no ‘Release strategy’ tab, then it didn’t work. In this case all is fine. The user can see the Release Group (AB), Strategy (S2) and release indicator (X).
(SAVE)
Release a Purchase Requisition
Releasing can be done per PR or collective. Lets’ use the collective release. SAP Menu: Logistics > Material Management > Purchasing > Purchasing Requisition > Release > Collective Release – ME55
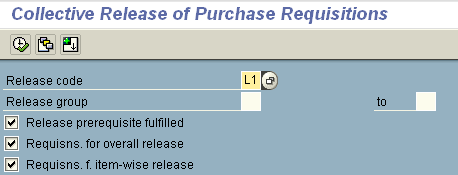
Select all the items to be released and then hit Save. You will see the status of the item change to the next Release Indicator.

This is the absolute basics of setting up Release Procedures for Purchase Requisitions. For more posts on Release Procedures, see index of posts.
SAP version used for this post: SAP ECC (ERP Central Component) 5.0